Approach and Mailchimp integration through Make.com
This tutorial will explain how to build a scenario in Make.com to automatically retrieve new customers from Approach and subscribe them to a list on your company’s Mailchimp account.
1. Request API key and AccountId from Approach
Email help@approach.app and request to generate a business API key and account name for the Make.com integration. You should receive the below:
{
"accountId": "youraccountId",
"serviceType": "publicApi",
"apikey": "yourapikey",
"enabled": true
}
2. Create a new scenario
Create a new account or log into your Make.com account and create a new scenario. 
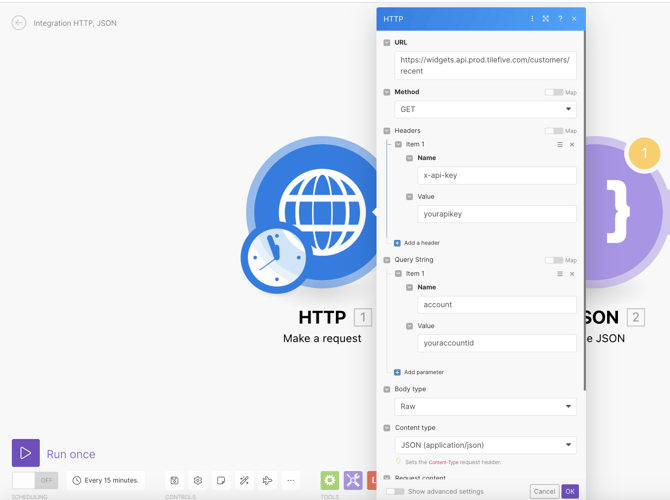
3. Set up the HTTP Module
This module gets recent customers from Approach
Select the HTTP module and make a request, and fill in the settings as follows:
- URL
- USA servers: https://widgets.api.prod.tilefive.com/customers/recent
- Australian servers: https://widgets.api.au-p.tilefive.com/customers/recent
- Method: GET
- Add a header named x-api-key and in the value field put the API key previously provided by Approach
- Add a query string named account and in the value field put your business accountId (also provided by Approach)
- "Add Parameter": You can set your URL parameter to be days or hours (this is how far back it will pull "recent" customers)
- Body type: Raw
- Content-Type: JSON (application/json)
Note: When setting up the modules in this tutorial, there may be other fields or options listed that are not covered in this article. Only edit the fields covered here, and leave any other fields or options blank or on the default setting.
It should look something like this:
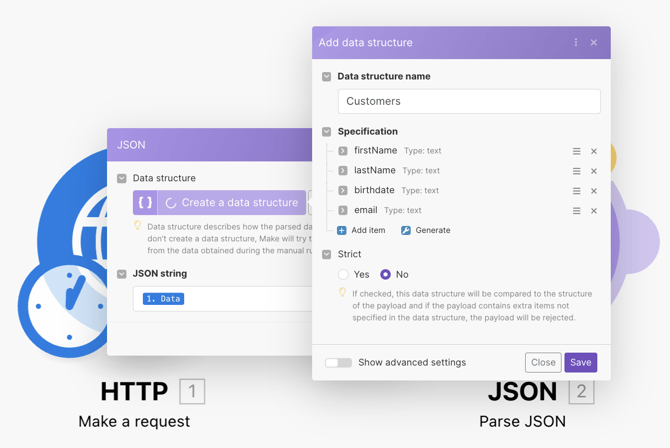
4. Set up the JSON Module
This module parses the data obtained from Approach
Click Add another module on the HTTP module and this time select JSON and then Parse JSON
- Add a new Data structure named Customers
- Add 4 fields to the structure, all of them of type Text.
- The fields are: firstName, lastName, birthdate, and email (these names are case sensitive)
- On the JSON string field select the Data property of the previous step (HTTP request).
Once complete, it should look like this:
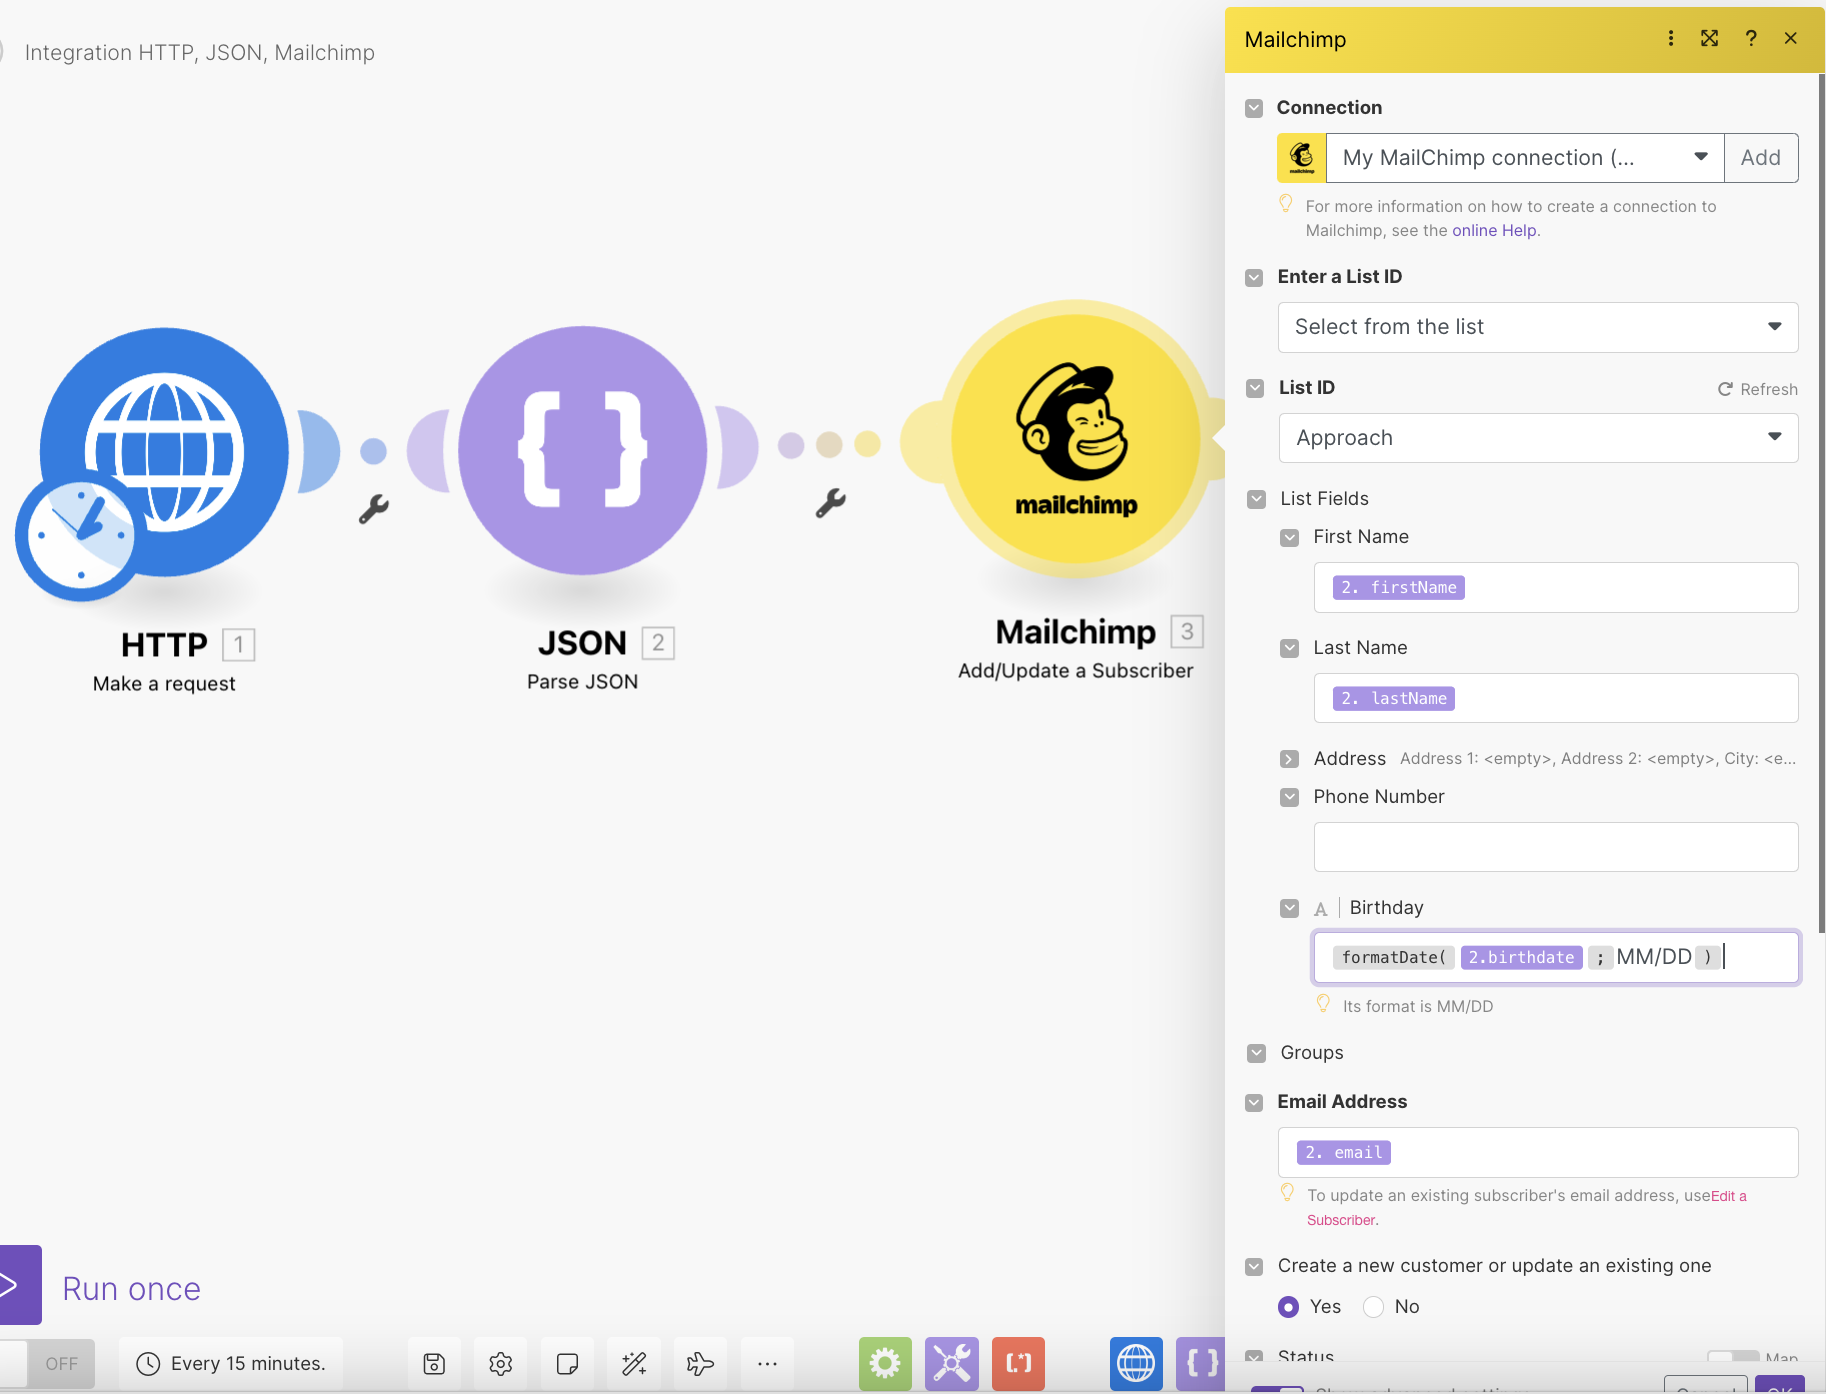
5. Set up the Mailchimp Module
This module updates your mailing list with new customers.
Now add a new Module, this time select Mailchimp with Add/Update a Subscriber so that new customers can be added to your mailing list on a daily basis.
- You’ll need to Add a Mailchimp connection: a window will pop up and you’ll need to allow the connection between Make.com and Mailchimp if you’re already logged into your account, or login into it and then do so.
- After that, you’ll need to select which List you’re going to be adding/updating subscribers into.
- On the Email Address field you need to select the email property from the JSON - Parse JSON step.
- On the List Fields section, you’ll need to match the First Name and Last Name fields with the properties from the JSON - Parse JSON step as well.
- The birthdate field is a little trickier, because it may need a different format from what it’s being returned from Approach. In case the birth date needs to be in the month/day format (MM/DD) you may use the formula shown below to transform the date to what it needs to be. Please consider that your modules may have different numbers assigned. So, the number that must go before ‘birthdate’ could be different.
Once complete, it should look like this:
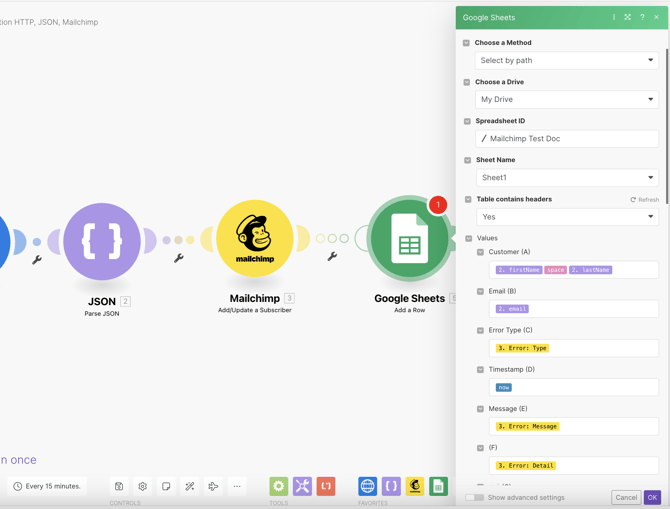
6. Set up the Google Sheets Module
This module keeps track of errors with Google Sheets
The idea is to add every error that may occur to a Google Sheet file so you can fix any bad data within Mailchimp.
Create a Google sheet with the following column headers: Customer, Email, Error Type, Timestamp, Message, and Detail.
Right-click on the Mailchimp module and select the Add error handler option. From the popup menu select Google Sheets and then Add a row
- Add a new connection to Google - this will open a new window in which you may log in into your Google account and connect it to Make.com.
- For Mode select Select spreadsheet and sheet.
- On Spreadsheet select the spreadsheet you created for this purpose.
- On Sheet select the sheet in which you want the data saved.
- For Table Contain Headers select Yes.
- For Values fill in the fields with the values coming from the Mailchimp and JSON steps as you can see below.
It should look like this:
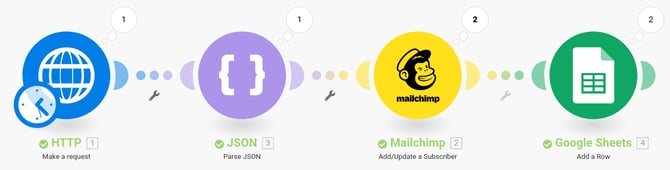
7. Test the integration
You can now click on the Run Once button at the bottom-left, and Make.com will try to run the steps. If successful, you’ll see a little counter on top of each step that shows how many records that step managed to process. In case any errors occur you will see the counter increase on the Google Sheets module as well.
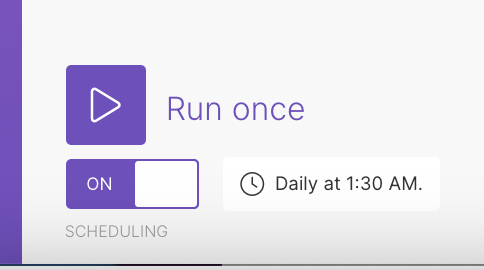
8. Schedule and Save the Integration
Once the scenario is tested and validated, you may go ahead and set the time interval in which it will run. This time interval is up to you, but many of our clients choose once a day at a set time. To do this you need to click Schedule Setting and set the time that work for you.
Make sure that scheduling is ON and hit the save button to save the integration. It’ll run automatically from now on.