
- Unbox the device as well as the cords included in the package. You should have one cord that will connect to power, and one that will connect to your ethernet router, modem, or splitter.
- A default ethernet plug or socket is included in the package -- if you need a different style of adapter to connect to your network setup, please reach out to onboarding@approach.app to order a different adapter.
- Plug in the power and ethernet cords. After a few minutes, you should see a white screen appear with an "Activation Code" that begins with the letter "P".
- If you do not see this code, and instead see "TriPOS", it is likely that the device is not connected to the network. To troubleshoot, try the following:
- Unplug and replug all cords.
- Ensure ethernet cables are securely inserted on both ends.
- Try to insert the cable into a different port -- many devices have multiple ethernet ports that provide different speeds.
- If you have done all of the above, and still do not have an activation code, please reach out to payments.support@fullsteam.com. Their team will help do further troubleshooting to determine if it truly is a network error or possibly a faulty terminal and help you with next steps.
- If you do not see this code, and instead see "TriPOS", it is likely that the device is not connected to the network. To troubleshoot, try the following:
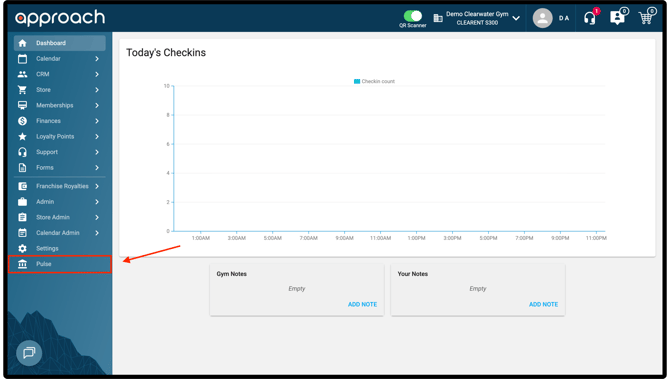
- Log in to the Approach Main App, and click on "Pulse" at the bottom of the left sidebar menu:
-
- This will open up Pulse in a new tab.
- If you do not see a new tab open, but some information about ApproachPay, this means one of three things:
- You do not have the correct permissions to access Pulse. Ensure that you have "Owner" permissions before attempting again.
- There is an issue with the payment configuration in Approach. Reach out to support via the chat bubble in the bottom left and select "Issue Request" so our team can resolve this.
- You are not using a location that is connected to Fullsteam. Make sure you have chosen the correct location using the location selector at the top (to the right of the QR code toggle).
- If you do not see a new tab open, but some information about ApproachPay, this means one of three things:
- This will open up Pulse in a new tab.
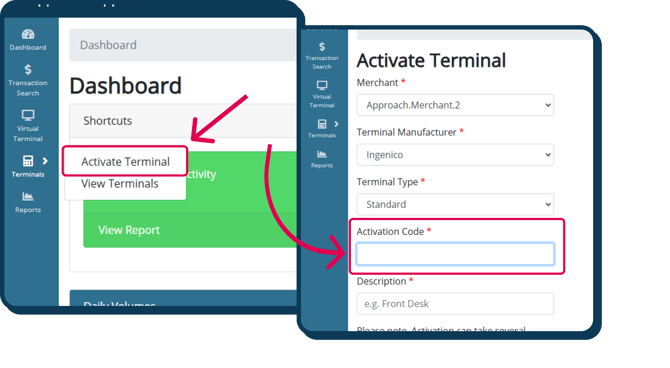
- Click "Terminals", then click "Activate Terminal". You'll enter the Activation Code, including the letter "P" and ensure the remaining information is correct. The Description can be anything you choose.
- Once activated, you'll see this screen displaying all activated terminals. You will copy the Terminal ID of the device you just activated.

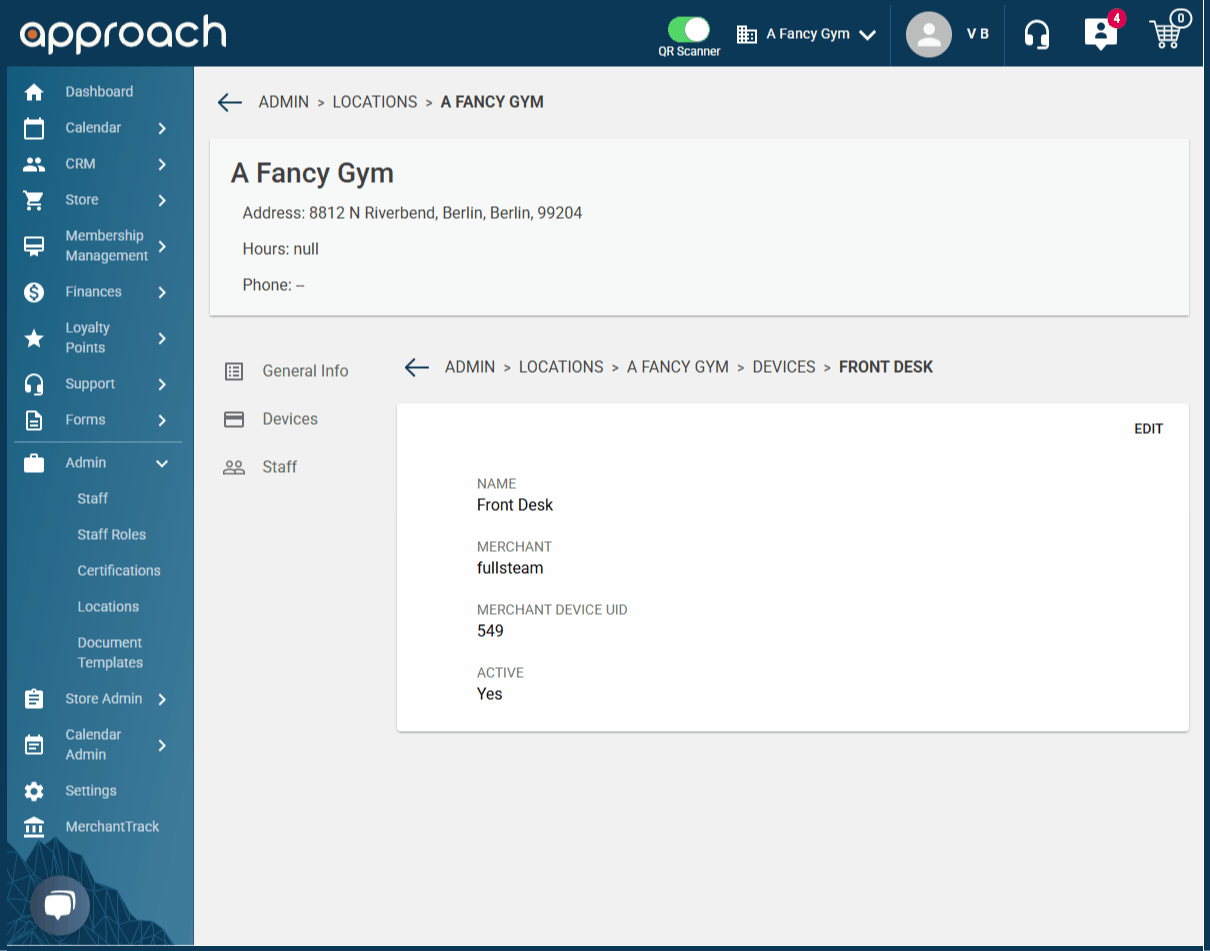
- Navigate back to your tab with the Approach Main App. Click on Admin, then Locations. Select the location this device is for, then click Devices.
- If a default device has been created for you, you will want to edit the existing device.
- If there is no default device, you will click Add Device

- Ensure the Device fields are completed properly. Paste the Terminal ID you got from Pulse in the Merchant Device UID field. Ensure the Active checkbox is checked, then hit save.

- Your terminal should now be set up in Approach! Next, re-select the location at the top bar, and select the now active device name.
- You must select the device at the top to be able to use it from that device. One device can be linked to multiple instances of Approach, as long as the device is selected at the top and you don't attempt to charge two different transactions at once!
- Lastly, you want to test two transactions to ensure the terminals are doing their job.
- First, sell yourself an item or gift card and checkout. You'll click "Charge New Card" to send the signal to the terminal. Make sure to save your card on checkout and confirm the order went through. If it did, great! If it didn't, take note of the error message and reach out to support via the Issue Request form.
- Second, sell yourself another item or gift card, using the credit card you just saved on file. Once this order goes through, we know the terminal is working properly to scan new cards and to save the card information for future transactions.
- Third, cancel the two orders you created.
That's it! If you reached here successfully, pat yourself on the back. 😎
If you reached here unsuccessfully, do not fear. Future pats on the back are coming. Please reach out to support via the Issue Request form and specify which step you got stuck on. We can always help with additional troubleshooting if needed.