What is the kiosk?
Our kiosk is where your members can sign in as well as where your guests can create an account. Everyone can sign a waiver from here as well as add others to their account. The kiosk is built for speed and ease of access at the front desk.
-
Logging in to the kiosk
-
Barcode Check-In Screen
-
How to Set the Inactivity Timer
- How to Create a Profile Using Manual Mode
- How to Add Dependents
- How to Sign a Waiver & Other Documents in the Kiosk
- Minors & the Kiosk
- Our Recommended Setup at the Front Desk
Barcode vs Manual Mode. What is the difference and why?
Barcode mode is used for scanning either a QR code or barcode to get into the gym.
Manual mode is used for creating accounts, signing waivers and adding people to households.
The kiosk is set to one or the other. It cannot be both as a scanner would recognize a barcode as a phone number essentially. Multiple devices however can be set up with whichever mode you would like with no limits. Settings are independent to each device.
Logging In to the Kiosk
- Where can I find my kiosk?
- Each gym has a unique url, akin to the main app. The same name space your gym uses for the main app with be used for the kiosk within the url namespace.kiosk.approach.app
- We recommend making Login credentials universal. We recommend creating a staff profile called "Kiosk Log In" and giving that profile no permissions besides the ability to view the dashboard
- We recommend this as it helps track check ins done through the kiosk as the staff that logs into the kiosk is the one that gets assigned to the check in record.
- We also recommend this because if admin settings need to be updated throughout the business day - it means that you don't have to track down the staff that logged into the kiosk (especially if they are not working at the time)
- We recommend using a generic email address the whole team has common access to, like info@, support@, noreply@, etc. to remove any confusion around signing in. Any email address will work. You just want to have something everyone on staff can have access to that won't get deleted.
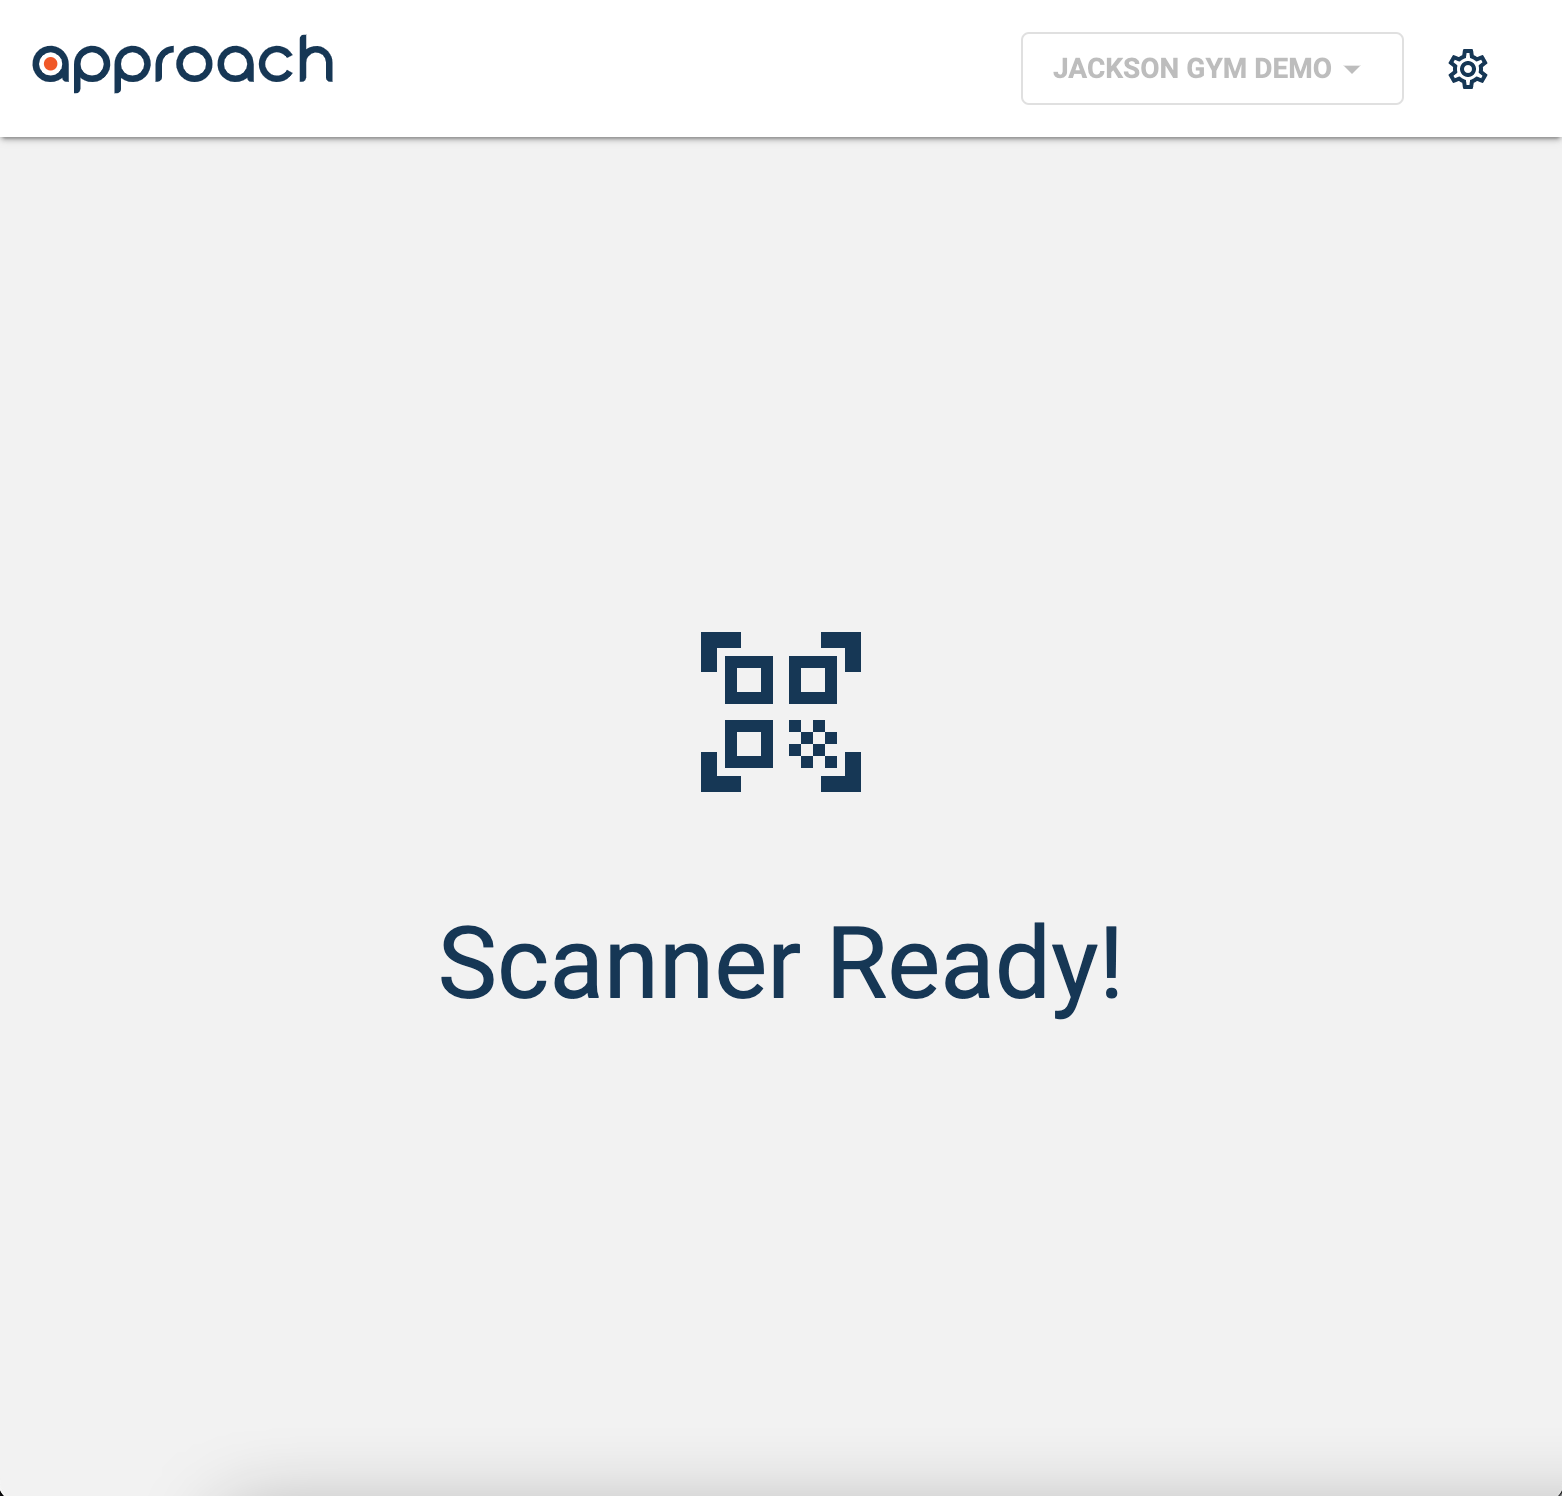
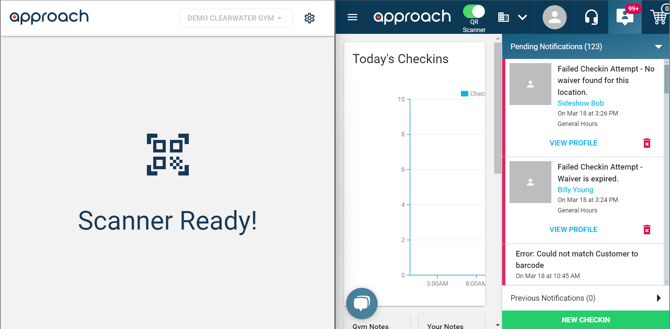
Barcode Check-In Screen
You have the ability to use the Kiosk as a dedicated Barcode Check-In Screen. After you connect a barcode scanner to the device, customers will be able to scan their barcode or QR code and instantly check in to general hours. Feedback will be provided to the customer on whether their check-in was successful or not.
Note: To use the Barcode Check-In workflow and the Manual workflow (search by # or create profile) at the same time, you will need to set up two devices. You can have as many devices as you want set up. The Settings for each device are unique to that device.
Setting It Up
- Click on the gear icon in the top right corner and sign into the Admin settings menu. You will now see a new field titled "Kiosk Mode."


Click the drop down and select "Barcode Check In"
- Underneath "Kiosk Mode," you will see a setting related to Barcode Check-In mode called "Barcode Reader Timeout."

- As the description states: "this setting manages how long the check-in notification screen will display before returning to the scanner screen."
- You will need to select a number (the timeout is in seconds) that fits your business needs. We suggest you start it at 5 seconds and adjust to your liking.
Reminder: Settings on the kiosk are device specific. If you have multiple devices you will need to edit the settings for each device. This give you the ability to have one or more devices as an account creator with manual phone number entry and one or more exclusively for barcode scanning.
How It Works
- If you are in the Admin screen, click "Back." You will now see the dedicated Barcode Check-In screen.
- Here is what the screen look like when it is waiting for a customer to scan their qr or barcode:
Note: This screen will only check people into General Hours, there is currently NO way to scan people into specific bookings.
-
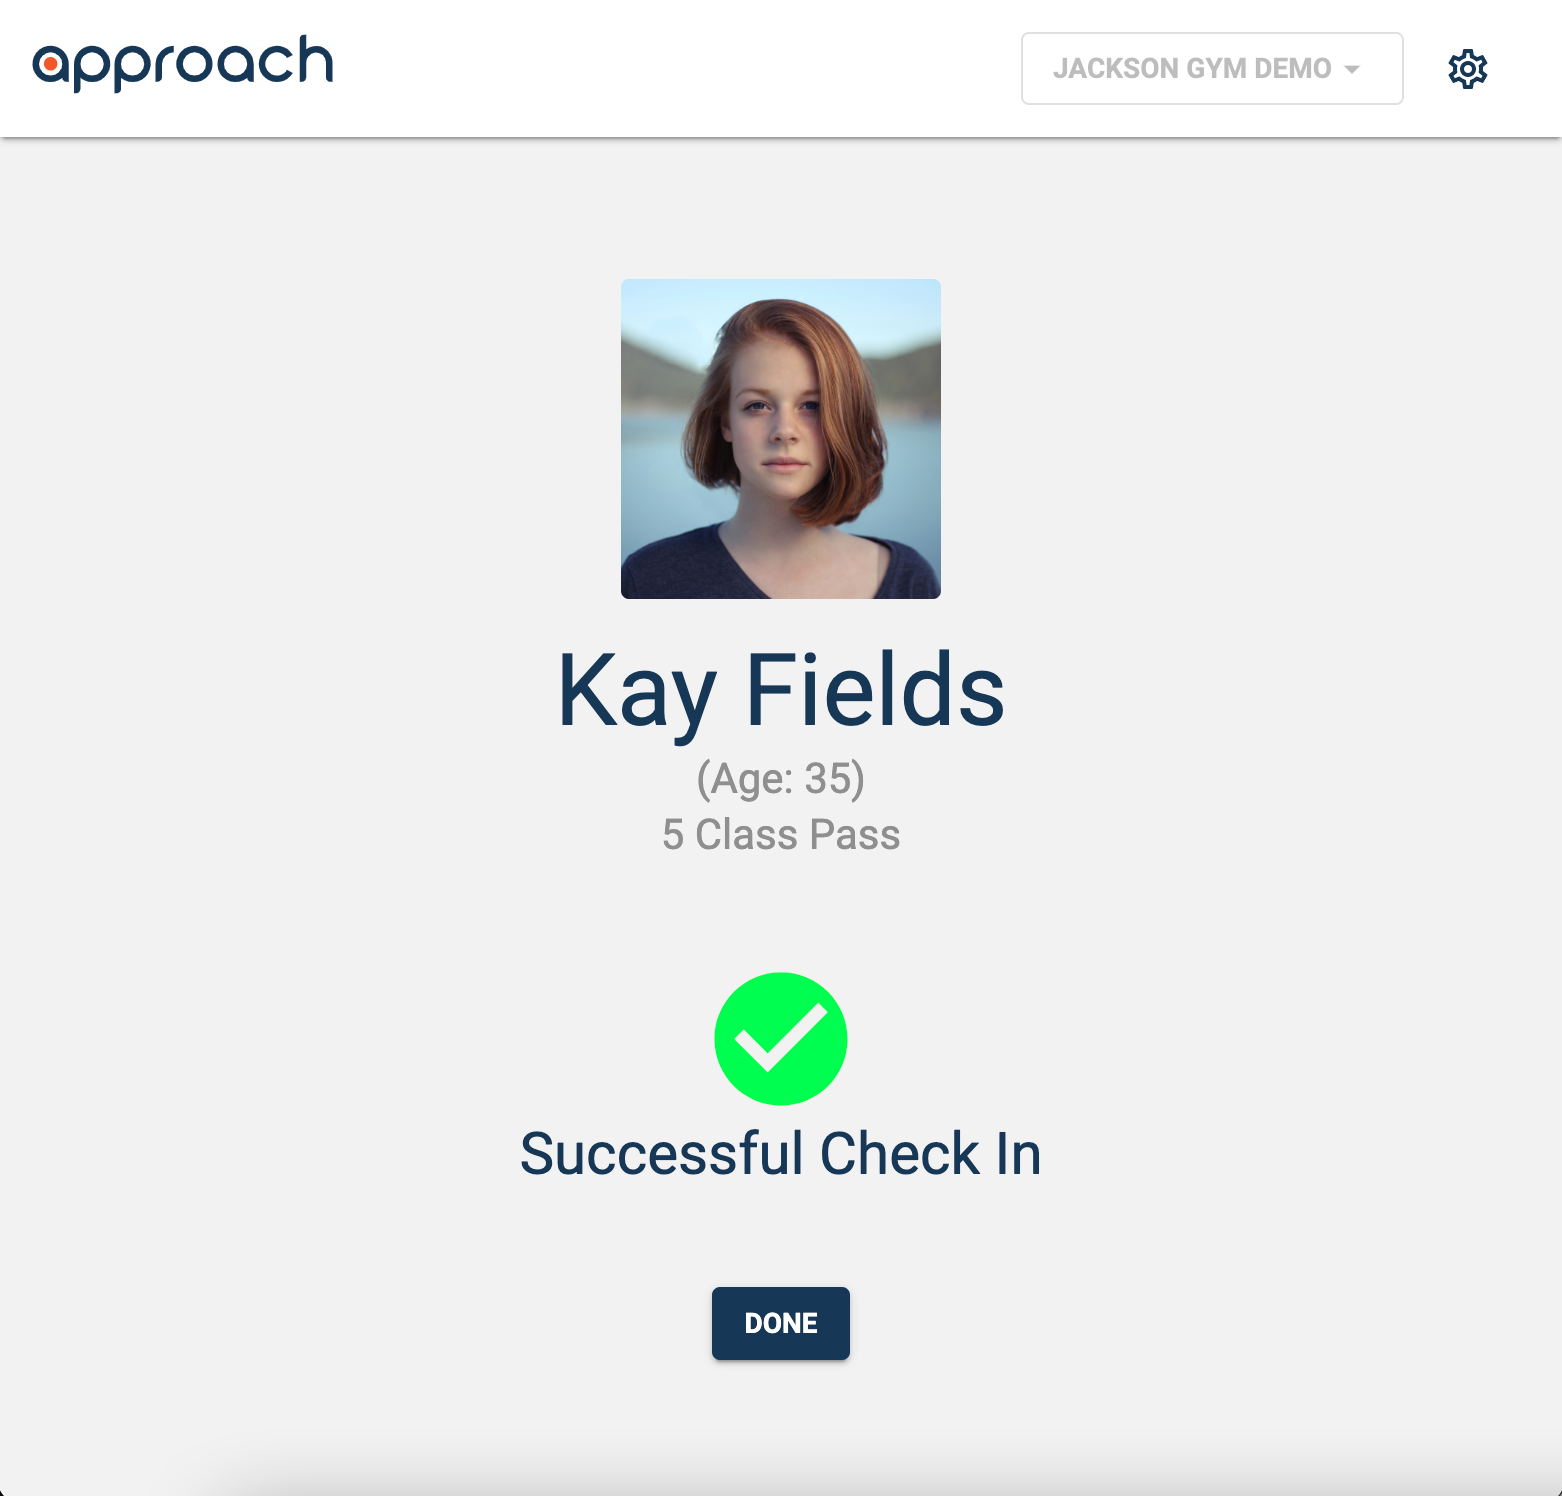
- If the customer has an active membership or pass that allows general hours access, a valid waiver on file, and any mandatory certifications the check-in will succeed ✅ and display the customer's name, age and what they checked in with. In the Main App, the corresponding, successful check-in will populate.
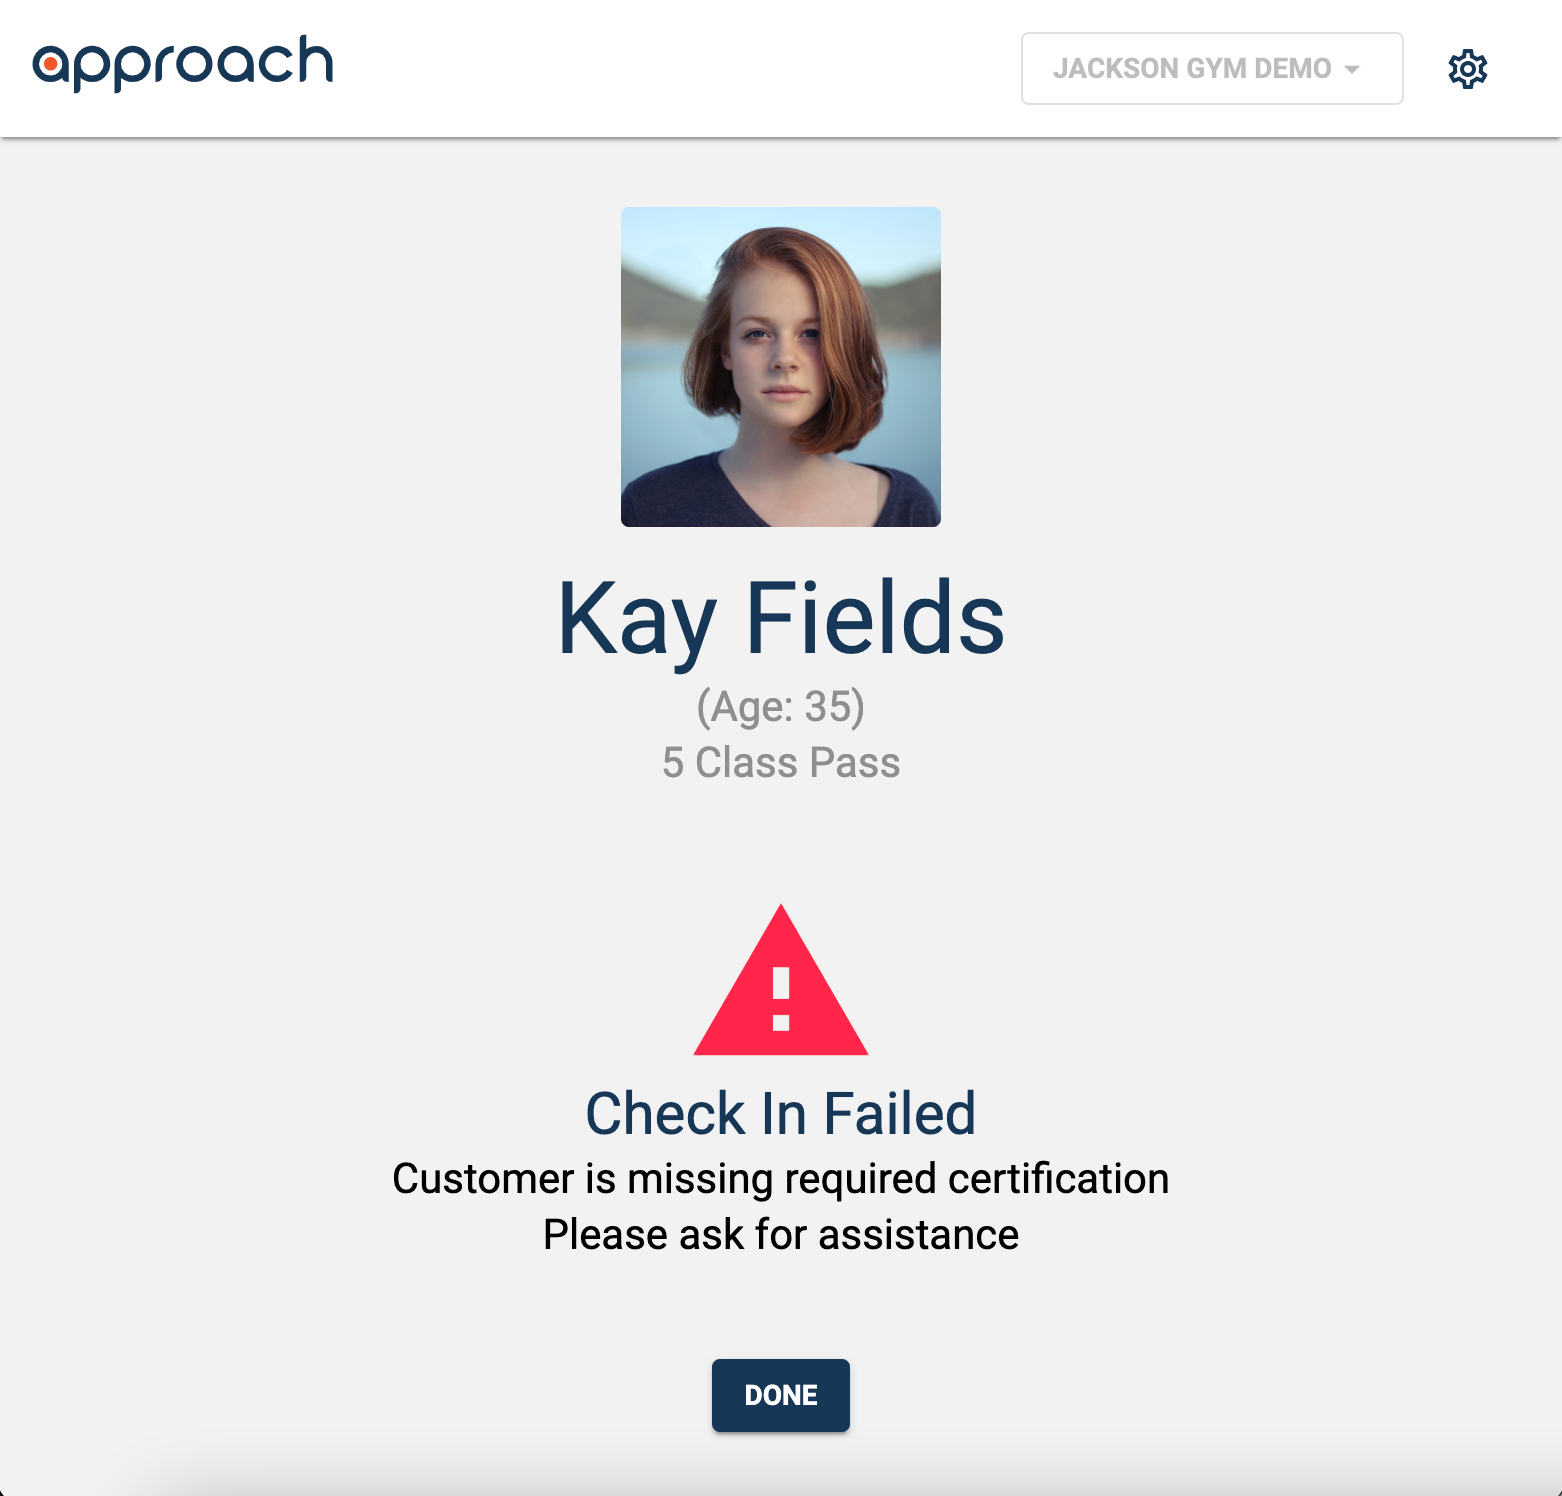
- If the customer does not have the appropriate information or access requirements, the check-in will fail 🚫, displaying the customer's name and age (if there is an account associated with the barcode/QR code) and display the statement, "Please ask for assistance."
Below are all the possible error messages and when they appear: - If a barcode/QR code is not associated with a customer account.

- If the customer has an active membership or pass that allows general hours access, a valid waiver on file, and any mandatory certifications the check-in will succeed ✅ and display the customer's name, age and what they checked in with. In the Main App, the corresponding, successful check-in will populate.
-
- If the customer has no valid membership or pass on their account.

- If the Pass or Membership type does not allow for general hours checkins.

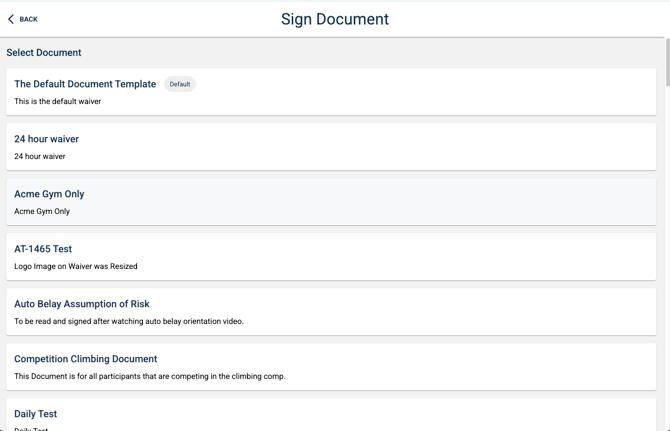
- If the customer does not have a valid waiver on file, they will be taken to the 'Sign Document' page to select the waiver to sign:
- If the customer does not have a mandatory certification on file.
- If the customer has no valid membership or pass on their account.
- You will notice that after scanning, the display screen has a "done" button, in order that customers can clear the screen of their check-in information when they are finished at the Kiosk. This simply takes them back to the "Scanner Ready" page.
- If the customer does not click the done button, once the time expires, set by the Barcode Reader Timeout setting, the screen will automatically return to the "Scanner Ready" page.
In the case that a customer scans again within two minutes of a first scan, using a "punch pass"...
If the first scan was successful, the second scan will also show a success notification, but will no longer show that a pass was used. Multiple scans within two minutes of the first scan WILL NOT USE another pass. However, if the customer scans outside of the two minute window, scanning again will result in the use of another pass to check in.
Inactivity Timer
- There is an inactivity timer under the admin section when you are using manual mode.
-
- This setting allows you to update the default time of 30 seconds to be however many seconds you deem to be an appropriate amount of time before the Kiosk should send the customer back to the home screen. See screenshot below:

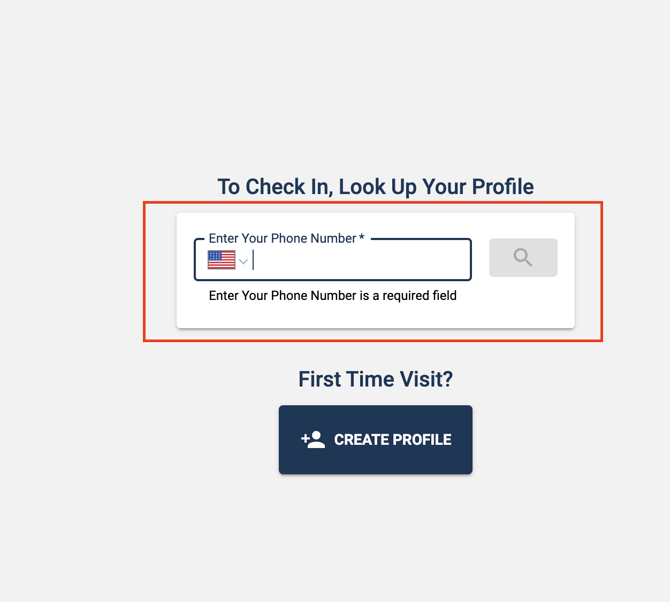
- Please note in the screenshot above you also have the option to control whether or not users can:
- Search by phone number
- Create a profile
- Or check in from the kiosk.
- This setting allows you to update the default time of 30 seconds to be however many seconds you deem to be an appropriate amount of time before the Kiosk should send the customer back to the home screen. See screenshot below:
Our Recommended Set Up at the Front Desk
For this to work properly, the window with the Kiosk must be selected with your cursor so the scanner sends the barcode or QR code information to the Kiosk screen. To avoid creating issues with customers checking in during peak hours, we also recommend setting the barcode reader timeout to either 1 or 2 seconds. The Main App window is exclusively being used to monitor those check-ins for any issues, which will be sorted to the pending notifications tab and can be dealt with by an employee on their primary work station. If a staff member attempts to deal with an issue by selecting the account on this screen, it will deselect the Kiosk window and the scanner will no longer be sending their barcode or QR code information to the Kiosk to check in.
Now you can have customers check in with a barcode or QR code and monitor their check-in status efficiently!
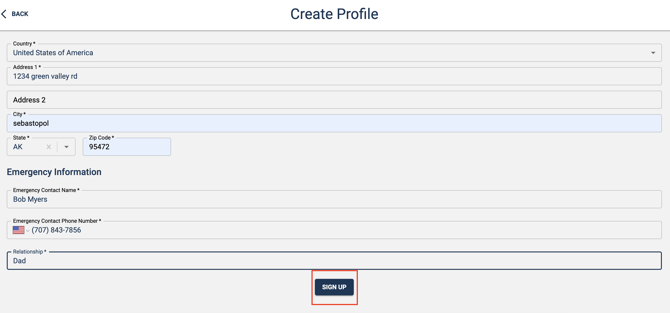
How to Create a Profile Using Manual Mode
- Start by either clicking "Create Profile"
- If you are creating a profile for just yourself, click "Myself (Adult 18+).
- If you are creating for yourself and/or other people, click "Parent/Guardian and Household Members".
- Once you have filled out all of the required info, simply click "Sign Up". You will not need to verify your email address.
Note: Minors cannot sign a waiver for themselves. If the parent or guardian is not participating at the gym, they will need to create their own account first, THEN create the account for the minor.
When a customer creates a profile through the Kiosk, or the Main App, and they wish to link this profile to the Portal for online use, they must create a profile in the Portal using the same email they made their profile with in the Kiosk. If a customer first makes a profile through the Portal, a profile in the Main App is already created for them and another one does not need to be made through the Kiosk.
How to Add Dependents
- Once you have created a profile, the next screen will have a few options. One of them is to add a dependent. You can also navigate to this screen with an existing profile by simply typing in an account's phone number on the home screen in manual mode.
- A super smooth function of adding a dependent is that you don't have to type your info again if it is the same! You can choose to either use the parent/guardian's contact info and or to use their Address.
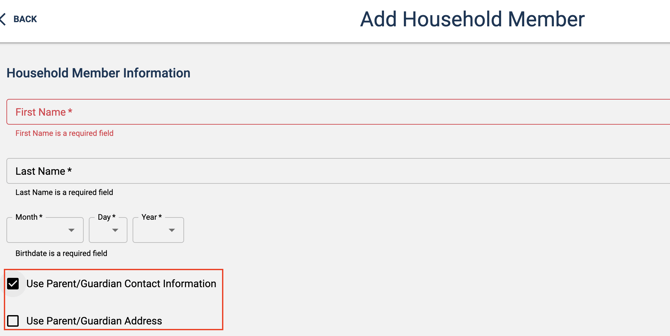
- Click Save When done.
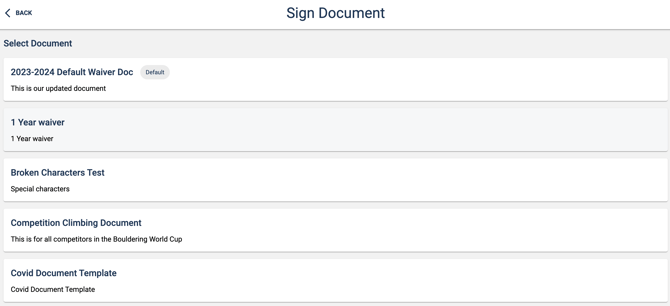
How to Sign a Waiver & Other Documents
- Once you have created a profile, or after entering your phone number, you can easily sign a waiver or other documents.
- Start by clicking the "Sign documents" button.
- Once you click in, simply click on the document you want to sign.
- Note the default waiver will always be at the top and have the "Default" badge next to it.
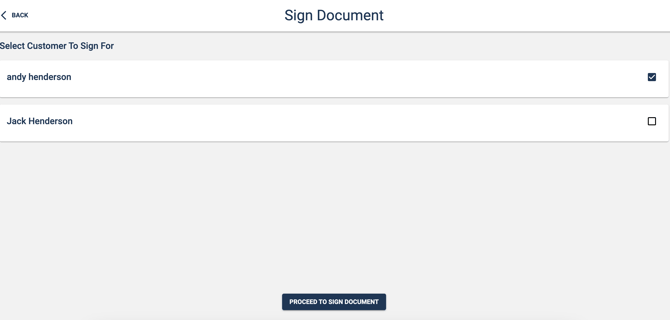
- After selecting the document to sign, click who you would like to sign for. Families can save time by creating all of their profiles first then signing all of their waivers at once.
- Follow the prompts to fill out the document selected by clicking "sign documents"

-
You will need to create a signature by simply clicking the create signature button.
- Proceed to click through all the required fields.
- Click "Agree and Submit" when complete.
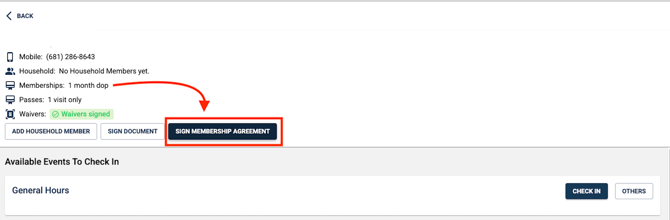
- If the customer has a Memberhsip Agreement that has not yet been signed they will be able to via the "Sign Membership Agreement" button:
Minors and the Kiosk
-
-
Minor's Abilities
- Minors are only permitted to check in on the Kiosk.
- They are not able to sign documents for themselves, add household members or check in other household members
-
That concludes the overview of the kiosk app.
Do you still have more questions? We want to make our Knowledge Base as accurate and as in-depth as possible. If you think this article is missing anything, please let us know here. We will update the article and let you know we have done so!