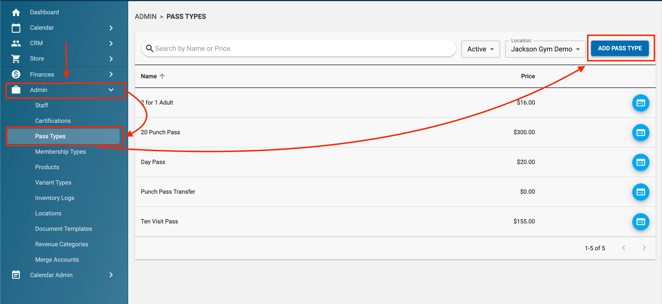
Creating Pass Types
Selling Passes Online
What is an asset in Approach?
An asset is any item that can be sold that will remain on a customers profile until used. Examples are memberships, passes and gift cards.
Creating Pass Types
Note:
For quantity: a single day pass would be “1” and a Ten Punch Pass would be “10.”
For price: this is the total cost, not the cost per individual punch on a multi-day punch pass. F.e. If your 10 day Punch Pass is $100 for 10 punches to come into the gym, you would type “100” into this field.
- All day pass: this setting, when turned on, permits unlimited checkins at applicable events at all participating locations in the same business day.
- Prevent General Hours Access: when this is turned on, customers can no longer check in for general access but they can check in to FCFS events that have the created Pass as an entrance requirement.
- Assign Revenue Category: assign the revenue category, so you can track the sale of this product through Quickbooks and Quicksight
- Valid locations: the pass will be valid for these locations.
- Terms and Conditions: your customer will have an opportunity to read these, if purchased online, and will be required to agree to them.
- Pass Expiration: utilize this feature to setup passes that have an expiration.
- Portal Settings: adjust the following settings, as desired.
- Permit customers to checkout this item as guest: on the portal, if the item is available for purchase, this permits customers to checkout this item as a guest. If this is left unselected and the item is available in the portal, customers will not be allowed to proceed to guest checkout in the portal.
- Manage online usage: 1) not for online use or sale-users will not be able to purchase this through the portal nor be able to checkin to events, 2) for sale & use online-public will be able to view, purchase and reserve applicable events, 3) for use online only-those who have purchased previously will be able to view and reserve an event spot online
- Age Restrictions: utilize this feature to manage age restrictions. Please note: if the user falls outside the age restriction, their checkin will fail. Also, passes with age restrictions can be purchased by anyone and assigned to anyone, regardless of age.
All assets in Approach can be configured to online in your portal. You can more info on this in the Portal Functionality knowledge base article. In this guide, we will cover all the ways a pass can be visible online. Please note: this entire section also applies to all assests, ie memberships and gift cards apply as well.
Before a pass can be sold online, this must be configured on each individual pass as to where it will be sold. On the pass type creation/edit screen, you will see the Portal settings for that asset. You will need to check either "For Sale & Use Online" or "For Use Online Only" in order for an asset to appear for sale online. 
Passes can be visible in the following ways:
- All passes are visible in the portal
- To configure this way, in the portal funtionality settings, select "Purchase a Pass" on the home buttons to show. This will show all passes that have been selected for sale or use online when configuring the pass.

- To configure this way, in the portal funtionality settings, select "Purchase a Pass" on the home buttons to show. This will show all passes that have been selected for sale or use online when configuring the pass.
- Only select passes are visible in the portal
- This can be done by choosing individual passes in your portal's functionality settings. Simply check the "Use Preselected Passes" box, then choose which passes you would like to display. This is a great way to organize your passes as well as to how they display. The first 3 passes will display in the top row, left to right and so on.

- This can be done by choosing individual passes in your portal's functionality settings. Simply check the "Use Preselected Passes" box, then choose which passes you would like to display. This is a great way to organize your passes as well as to how they display. The first 3 passes will display in the top row, left to right and so on.
- No passes are visible in the portal, but can be sold to those sent a portal link
- In order to have no passes visible, deselect both the "Show Passes" & the "Use Preselected Passes" button. These passes will still be able to be sold online, but only to those that have the link to them. You can find the "Get Portal Link" button on every passes edit page.
- Portal Links can be embedded on your website as well. For more info on embedding links, proceed to our How to Imbed Approach Into Your Website.

- You can copy this portal link and share it however you wish. This is a great way to have passes you want to share to an exclusive list of customers.
- Two good use cases for this is sending passes to friends or family when first opening your gym or if your gym is having an invite only party.
If you have more questions on Pass Type Creation or notice anything in this article that needs to be updated, please reach out to our support team!