Portal Booking Requirements & Featured Assets
Display of Bookings for Multiday Events
Portal Booking Requirements & Featured Assets
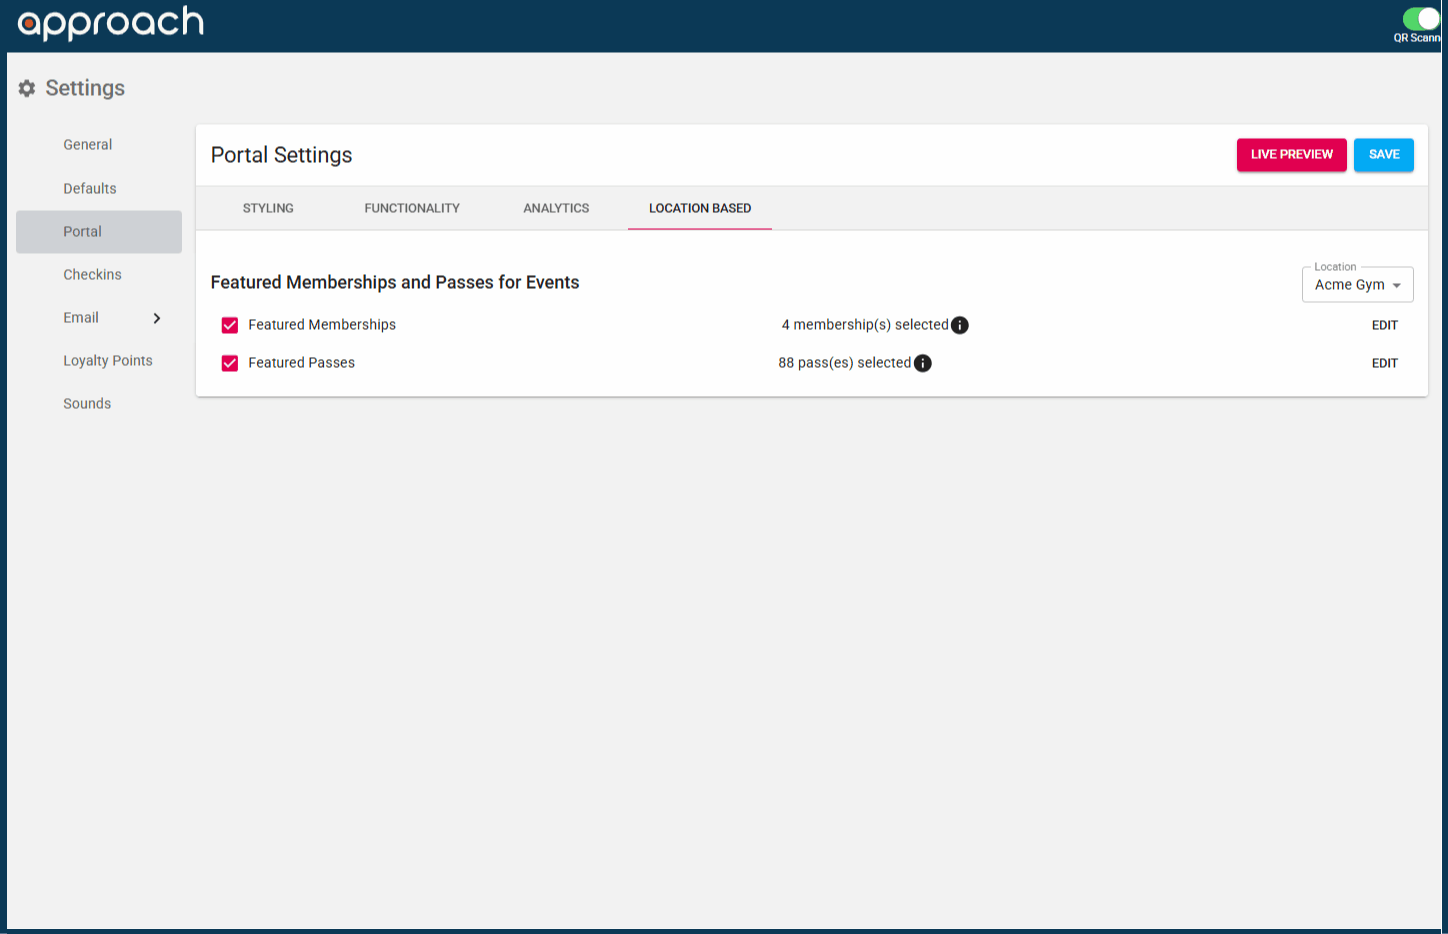
In the portal, the requirements for booking an event for some events can include what memberships or passes are required to get into an event. On each event, these requirements are established. On the portal, the requirements can be highlighted or featured by utilizing the Location Based functionality using a simple drag and drop interface.
To get there, in the Main App, go to Settings, then click Location Based.
.png?width=688&height=371&name=Wide%2c%20Template%20-%202025-03-27T140234.997%20(1).png)
How to Set Up
- From the Location Based Tab, you will see the Featured Memberships and Passes for Events window.
- Start your configuration by selecting the location you want the settings to apply to.
- Click both the check box and the edit button will open the edit dialogue.
- Next simply drag the memberships or passes you want to feature to the right-hand side.
- Everything dragged to the right side will appear at the top of the View Valid Memberships/Passes button dialog box in the order you choose.
- You can drag left to right as well as up and down within a column.
- Once you have arranged how you would like the assets to present, click Save in the bottom right.
- Now you will have the option to click Live Preview or the Save button on the Portal Settings page.
It is paramount that you click save on both the configuration window when done dragging and dropping as well as on the Portal settings page. If you do not click save on both pages, your portal presentation will not change.
- You will now see these changes within the View Valid Memberships/Passes buttons on your portal.
-1.png?width=608&height=372&name=Frame%202%20(1)-1.png)
Display of Bookings for Multiday Events
.png?width=688&height=327&name=Screenshot%202025-04-28%20at%203.36.56%20PM%20(1).png)
This feature allows users to choose whether to display only the first day of a multi-day ticketed event, effectively hiding subsequent recurring bookings from the portal’s schedule list view and week view.
Key Features
-
Default Behavior: This setting is enabled by default, all bookings associated with multi-day ticketed events will be displayed individually in list mode
-
When Disabled: Only the first day of multi-day ticketed events will appear on the schedule screen.
If you have any more questions on the Location Based Settings of your portal settings, fill out the questions form in the main app support chat bot or email us at cxm@approach.app.